Whether you're kickstarting your self-custody journey or a seasoned pro, this BitBox02 setup guide will help you to safely set up and use your BitBox02 cryptocurrency hardware wallet.
Setup time: 10-15 minutes
Setup difficulty: Beginner friendly.
Overview:
- Initial pre-setup checks
- BitBox app installation
- BitBox02 device setup
- Seed phrase backup
- Transaction testing
1) Initial pre-setup checks
Before you get started with the BitBox02 setup, just take a minute to check you have all the items needed.
The BitBox02 comes with the following:

Additional items needed:
- A desktop, laptop or android device (to access the BitBox App)
- A pen/pencil (to write down your recovery words)
Once you've checked that you have all the correct items and you are in a safe, trusted space, you're ready to get started.
2) BitBox app installation
The first thing you will need to do is download the appropriate version of the BitBox app, you can select this from the download page here.

Once you have chosen the correct version for your device, follow the necessary installation process and then run the application on your chosen device.
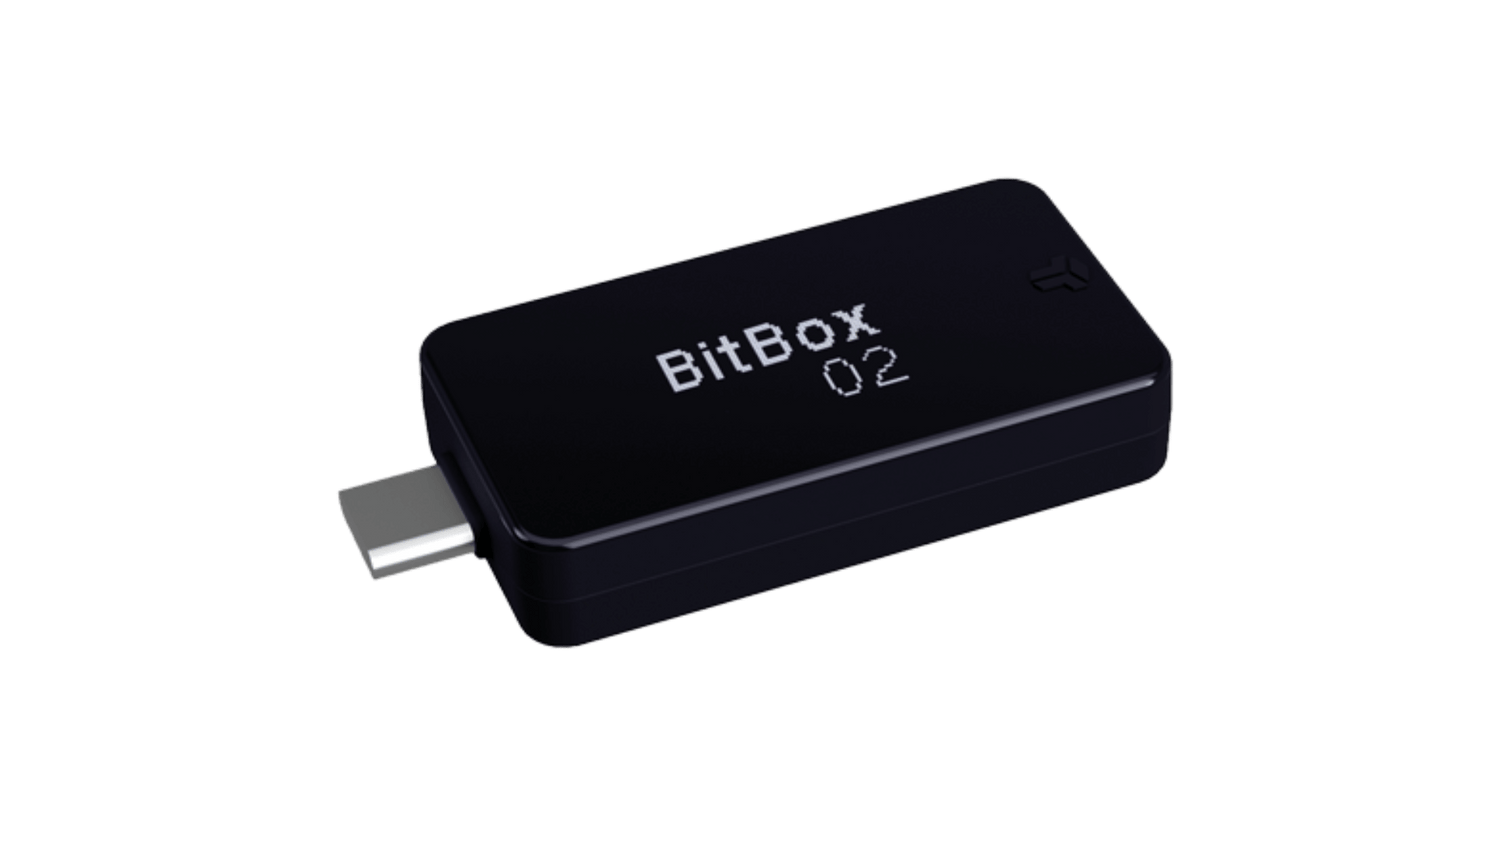
3) BitBox02 device setup
With the BitBox application installed, you can now plug your BitBox02 into your chosen desktop/mobile device.
Note: The BitBox02 uses a USB-C connection, for devices that use a USB-A port you should use the USB-C to USB-A adapter which is provided.
With the BitBox02 plugged in you should have a welcome message displayed on your BitBox as well as a prompt to return to the BitBox app to begin the firmware update.

The update process is nice and simple, with the BitBox02 still plugged in, begin the update process from the app. This shouldn't take longer than a few minutes to complete. You may need to repeat from time to time as and when new updates are made available, so it's handy to get familiar with doing it early on.
Next, a series of pairing codes will be displayed on the screen. You should ensure that these match the pairing codes displayed on your BitBox02 before you continue.
With the device successfully synced and running the latest updates, you will now be given the option to 'Create' or 'Restore' a wallet.

For the purposes of this guide, we will just be creating a brand new wallet. In order to begin this process, you will need to insert the provided MicroSD card into your BitBox02 and select the 'Create Wallet' option.
Tip: Be careful when inserting the MicroSD card so as not to cause any damage, there should be an audible click when inserted correctly.
You will then be prompted to create a name for your new device and a secure password. Make sure to use a strong password that you don't use for any other accounts.
4) Seed phrase backup
The next step is hugely important, as this is where your seed phrase will be created. Remember, these seed words are the key to recovering your assets if your hardware wallet is lost, stolen or damaged - anyone with access to these can access your funds.
Make sure you thoroughly read through the following series of statements displayed on the screen:
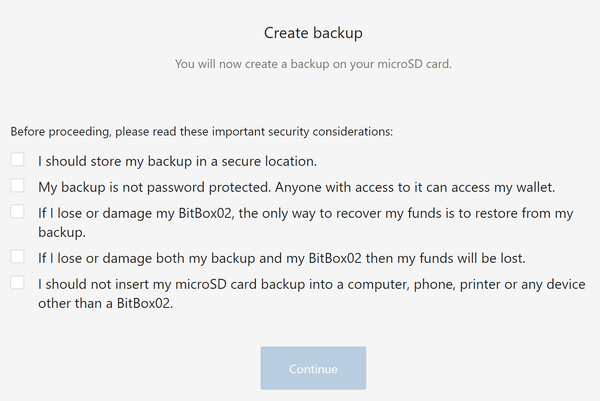
The BitBox02 has a really easy-to-use solution for seed phrase storage, using the MicroSD card provided you can quickly create a secure digital backup. Using this method allows you to quickly regain access to your funds just by loading the seed phrase stored on the card. The setup steps are displayed on screen.
Once this step has been completed you can go to the 'Manage Device' tab in the BitBox app, and display your 24-word seed phrase in order to make a more robust and longer-lasting backup of your seed phrase.
Both options allow you to recover access to the funds stored on your BitBox02, albeit storing your seed phrase in a physical, offline environment is the preferred choice for a long-lasting self-custody approach.
Tip: You can view a range of different solutions for seed phrase storage here.
6) Transaction testing
Now, this is the last stage of the setup - familiarising yourself with the process of sending and receiving cryptocurrency using your BitBox02. Getting to grips with this process early on will ensure that you can seamlessly transact whenever you need to, without needing to refer back to this guide every time.
It's important to remember that neither your BitBox02 nor your BitBox app holds any cryptocurrency. The BitBox02 holds your private keys (proof of ownership) in an offline environment, and the BitBox app enables you to interact safely with the online world, without exposing your private keys.
Receiving cryptocurrency:
- Go to the 'My Portfolio' section of the BitBox application.
- Select the cryptocurrency you want to receive, for example; Bitcoin.
- Click on the 'Receive' button. This will display your Bitcoin receiving addresses. To increase privacy and security, never use the same address twice. You can click on the right arrow for a new address.
- Go to the exchange/application/wallet you are sending your Bitcoin from and paste the receiving address or scan the QR code from the BitBox app.
- Once the Bitcoin has been sent to your BitBox02, you should receive an initial alert to notify you of an inbound transaction and then a short while later the amount will be added to your available balance.
Sending cryptocurrency:
- Before you begin this process, make sure your BitBox02 is plugged into your desktop/android device.
- Go to the 'My Portfolio' section of the BitBox application.
- Select the cryptocurrency you want to send, for example; Bitcoin.
- Click on the 'Send' button. Here you will have a number of available options displayed, first and foremost ensure the address you are sending to is correct and add an amount to send. You can also tweak the priority level to alter the fees involved in the transaction. Once you are happy with all of the details entered, click 'Review'.
- To finalise the transaction, return to the BitBox02 and double-check that the details displayed in the app match the details displayed on your wallet. If you're confident that all the details are correct then follow the steps to sign and complete the transaction.
There you have it, just about everything you need to know to begin using your BitBox02 safely and securely.
If you have any concerns or issues during the setup process, please do reach out to us via our live chat, or contact form or leave a comment below and we'll more than happily answer any questions you may have.
Useful Resources:
BitBox | Official UK Retailer - Free Delivery - 30-day Returns (cryptonest.co.uk)
How to setup & use the BitBox02 - Beginner's Guide - YouTube